Tabs

home aboutme homedecor recycle sew organize gallery
Showing posts with label Craft. Show all posts

Sunday, May 17, 2020

Kids Craft: Rainbow Hearts Banner

Hearts Banner, is a perfect project to do during the quarantine. We all would have some cardboards lying around at home. Creating something from nothing brings great joy to little ones. And in the end, kids will have their own masterpiece to decorate their room with.

Kids craft, Cardboard craft, Heart banner, DIY Kids room Decor, Easy crafts for kids

I and my 3-year-old enjoyed making this together. We painted it my little one's favorite rainbow colors. She is obsessed with anything rainbows, unicorns, or animals. We hope you will enjoy making it too.

Kids craft, Cardboard craft, Heart banner, DIY Kids room Decor, Easy crafts for kids

You need cardboard,  scissors, and a heart template to start with. Here I am using a heart cardstock cut out from a valentine banner that I made long ago. You can draw a heart and cut it out or print a heart shape and cut it to use as a template. Having a template on hand makes it easy to get all of them in the right size.

Kids craft, Cardboard craft, Heart banner, DIY Kids room Decor, Easy crafts for kids

Using a pencil trace around your heart template on cardboard. You can trace as many hearts as you like. We did 7, each one for each color of the rainbow.

Kids craft, Cardboard craft, Heart banner, DIY Kids room Decor, Easy crafts for kids

Then I cut the hearts out using scissors. If you are letting your kid handle the scissors, then use your own judgment. My 3-year-old is too young to cut cardboard, so I did that for her. 

Kids craft, Cardboard craft, Heart banner, DIY Kids room Decor, Easy crafts for kids

She had so much fun coloring the hearts. We used acrylic colors. Best Tip: Use a cheap cookie tray for painting little things with little ones. It always helps keep the mess contained. I got my cookie tray long ago at Walmart for 80c. It was well worth it. 

Kids craft, Cardboard craft, Heart banner, DIY Kids room Decor, Easy crafts for kids

After the paint dried, I coated them with clear varnish to give them a nice finish. And let dry again.

Kids craft, Cardboard craft, Heart banner, DIY Kids room Decor, Easy crafts for kids

Stick the hearts to a thread using tape. And tada! hearts banner is ready to add color to your walls.

Kids craft, Cardboard craft, Heart banner, DIY Kids room Decor, Easy crafts for kids

My little one put it above her play kitchen. I think it looks so cute. What do you think? Let me know in the comments. I would love to hear from you. Thank you for stopping by.

Monday, May 4, 2020

Kids Craft: DIY Bird House

DIY Bird House, Kids Crafts, Summer activities for kids, Kids DIY, Kids DIY Bird House

We live in Florida and the weather here has been beautiful for past 2 months. My daughter and I spend most of our quarantine in our patio. Our mornings are filled with sweet birdie tweets and melodies. Last week I decided to make a bird house and we up-cycled our empty milk mug into this cute little bird house. 

DIY Bird House, Kids Crafts, Summer activities for kids, Kids DIY, Kids DIY Bird House

You need scissors, an empty milk jug and some duct tape to make this bird house. We used some acrylic colors and stencils that we had on hand to decorate it but this step is totally optional.


DIY Bird House, Kids Crafts, Summer activities for kids, Kids DIY, Kids DIY Bird House

I used my duct tape to trace 2 circles on the milk mug and cut them out with scissors. Use your judgement if you are going to let your little one handle the scissors.

DIY Bird House, Kids Crafts, Summer activities for kids, Kids DIY, Kids DIY Bird House

Then we both covered the cut circles with pieces of duct tape as shown in the picture, just to protect the birds from any sharp edges.

DIY Bird House, Kids Crafts, Summer activities for kids, Kids DIY, Kids DIY Bird House

Decorating our bird house was so much fun. My little one loved having the freedom to pick colors of her choice and sponging the paints all by herself. She was super excited to remove the stencil and see how beautiful the flowers turned out.

DIY Bird House, Kids Crafts, Summer activities for kids, Kids DIY, Kids DIY Bird House

After the acrylic colors dried out I took out my clear spray can that I had left over from years ago and sprayed it lightly on our design to protect it from rain. I closed the bird holes with the cut out circles and tape as shown in the picture as not to get any spray inside the bird house.

DIY Bird House, Kids Crafts, Summer activities for kids, Kids DIY, Kids DIY Bird House

We used couple of bamboo skewers from our kitchen and made little platform for birds entrance as shown in the picture above. After getting the skewers in right position I cut off the sharp pointed ends a little so that it will be completely safe for the birds. You can instead use the popsicle sticks if you have.

DIY Bird House, Kids Crafts, Summer activities for kids, Kids DIY, Kids DIY Bird House

I used an Xacto knife to make small slit on the top of the jug next to the cap and put a bird feeder chain through as shown in the picture. Then we hung it on a tree next to our patio using a S hook.

DIY Bird House, Kids Crafts, Summer activities for kids, Kids DIY, Kids DIY Bird House

We filled the bird house with wild bird food and we desperately waited for it’s visitors. The birds took couple of days to visit our bird house. Few sparrows and cardinals enjoyed the feed but soon squirrels invaded it. Nonetheless my little one enjoys squirrel watching too so it was still a win for us. 

Hope you enjoy making a bird house with your little one as much as I did. Let me know what you think about our bird house in the comments. I would love to hear from you. Thank you for stopping by. 

Thursday, April 23, 2020

Little Projects for my Little One Part-3

Hello all, Hope you are all doing good. I missed blogging so much in the past few years. I had to take a break to shorten my to do list and keep myself sane for a bit. But it turned out keeping myself busy is what keeps me sane. Isn't that funny? Let me continue from where I stopped. I was sharing the little projects that I put together before my baby arrived and this part 3.

DIY little girl's Jewelry Chest, Baby Photo Frames, Pink heart Pillow cover, Floral Basket, Baby Nursery Projects, Nursery Crafts

How cute is this little jewelry chest? I saw a similar one in Etsy listing but they were all sold out. Later when I saw this empty wooden chest at Michaels I had to grab it. I painted it in white and shades of pink Ombre style. Decorated the top 2 drawers with flowers and second row with simple polka-dots using nail art dotting tools. The third row I wanted to paint tiny hearts so I used my cricut to cut out a customized stencil to get a perfect finish.

DIY little girl's Jewelry Chest, Baby Photo Frames, Pink heart Pillow cover, Floral Basket, Baby Nursery Projects, Nursery Crafts

The picture above gives you a glimpse of how I painted it.

DIY little girl's Jewelry Chest, Baby Photo Frames, Pink heart Pillow cover, Floral Basket, Baby Nursery Projects, Nursery Crafts

I love hearts and I had this heart shaped pillow that I got from my husband as a gift. But it's bright red looked out of place and I wanted to cover it in pink to go with my theme. I got this pink rosette textured fabric from etsy and sew this simple pillow cover similar to my patio pillows except this one is cut in heart shape and I just added a Velcro piece for closure.


DIY little girl's Jewelry Chest, Baby Photo Frames, Pink heart Pillow cover, Floral Basket, Baby Nursery Projects, Nursery Crafts

It was a quick project and I heart how it turned out.

DIY little girl's Jewelry Chest, Baby Photo Frames, Pink heart Pillow cover, Floral Basket, Baby Nursery Projects, Nursery Crafts

I saved little scrap wood pieces from DIY Coat rack project and this scrap wood photo frame was a simple project to put them to use.
DIY little girl's Jewelry Chest, Baby Photo Frames, Pink heart Pillow cover, Floral Basket, Baby Nursery Projects, Nursery Crafts

I covered the wood pieces with scrapbook papers using modpodge and added wood dowel pieces to the back to make them stand. For the pink one I just mounted the picture using double side foam tape. For the grey color one I decided to add those little clips to make it extra cute. And I had grabbed that oval shaped frame from Michaels Dollar bin long ago. I just spray painted that one white.

DIY little girl's Jewelry Chest, Baby Photo Frames, Pink heart Pillow cover, Floral Basket, Baby Nursery Projects, Nursery Crafts

I found this cute basket at Target for 3$ and thought it would be perfect to fill it with diapers next to the changing station. 

DIY little girl's Jewelry Chest, Baby Photo Frames, Pink heart Pillow cover, Floral Basket, Baby Nursery Projects, Nursery Crafts

I made these easy felt flowers and stuck them to basket using hot glue. You can refer my easy gift bag tutorial if you want to see how these flowers are made. I love how girly the basket looks now.

Hope you enjoyed reading this post. Let me know what you think about these simple projects. Would love to hear your comments. Thank you for stopping by.

Saturday, April 21, 2018

Little Cricut Projects for my Little one Part-2

Handmade products are the best and when they are made for your tiny bundle of joy they become even more precious. Here is the second set of crafts that I did for my little one.


I always dreamed of having a little girl, so of course I had to make a banner for our maternity photo shoot to shout out my joy and here is that. I made this onesie banner with the help of my Cricut cutting machine. It saves me whole lot of time now that I have other things to take care of.


I just designed my project in Cricut software and put the pieces together once they are cut. It took a little bit of time until I got hang of the machine and now I just love it.


I saw these cute onesie designs on a shopping site but I wanted to give my Cricut a shot, so I designed stencils and used Martha's multipurpose acrylic paints that I already had on hand.


They turned out really cute. Did you ever go shopping clothes for a little girl? Most of the time they have quotes only about dad's like Dad's little princess etc., so I just loved this quote "I'm Cute. Mom's Cute. Dad's Lucky"and I just had to recreate it.


This was my first Iron on project and it was Super easy to do. I chose the word #adorable for this little baby pink onesie.


My Cricut cut through the gold glitter iron on like it was butter. All I had to do was follow the instructions that came with my iron on sheet and after that little bit of ironing it was all done. I used Cricut Iron on sheet and it stayed so well even after multiple washes.


I wanted a 3 piece wall art to go above my baby crib. I saw these wooden boards at Michaels and started brainstorming.


I decided the 3 quotes I wanted on them and whipped up these cute designs on Cricut with card stock and scrapbook papers I had on hand. Personally I think this wall art didn't turn out exactly like how I imagined but I still love it. What do you think?

Would love to hear your comments. Thank you for stopping by.

Wednesday, October 18, 2017

Sreemantham Decoration (South Indian Baby Shower Decor)

Hi there, its been more than a year and I am finally getting back to my blog. Life is busy with baby, I am glad I had my family and a loving husband all through the though times. Okay life aside lets get back to the Sreemantham decor I did for my own Sreemantham a year and half ago. Sreemantham is a traditional South Indain Baby Shower.

       Here is a detailed video I made recently with clear explanation.
                                    

Sreemantham Decoration, DIY South Indian Baby Shower Decor Ideas

I planned this backdrop way ahead. I wanted something traditional, simple and definitely have a god idol or symbol on the backdrop. I wanted to take it easy and go with age old maroon and cream color combination. This flower Ganesha from a wedding picture that I saw long back on Pinternet was my inspiration. However I didn't want to use fresh flowers because it can be overwhelming to do things on the celebration day. So I went ahead and ordered these fabric flowers from this etsy store they took around 15-20 days to reach me.


Sreemantham Decoration, DIY South Indian Baby Shower Decor Ideas

I used dollar store foam board and started roughly drawing outline of Ganesha. I kept everything (hands, legs of the idol) connected unlike my inspiration image to make it easy for hanging on backdrop. I would recommend using thick cardboard instead of foam board if you have patience and energy to cut it. As foam board wears out easily once painted. Foam board will survive for one time use though.


Sreemantham Decoration, DIY South Indian Baby Shower Decor Ideas

When I felt satisfied with the outline I used an exacto knife to cut along the outline.


Sreemantham Decoration, DIY South Indian Baby Shower Decor Ideas

I painted it with red acrylic paint to match the flowers so that the white board won't peek through red flowers.

Sreemantham Decoration, DIY South Indian Baby Shower Decor Ideas

Using hot glue gun I stuck fabric flowers as close as possible to each other all along the cut foam board. I had to cut the plastic stalks under the flowers to make them stick properly.

Sreemantham Decoration, DIY South Indian Baby Shower Decor Ideas

Using a piece of yarn I hung it on the backdrop stand. I reinforced the back of Ganesha cutout with few more foam pieces and hot glue to make it little strong at joints.

Sreemantham Decoration, DIY South Indian Baby Shower Decor Ideas

For the backdrop, I bought satin cloth and backdrop stand on amazon. I stitched a huge curtain using cream color cloth with pocket at top to insert rod. I followed this video from youtube to put up my backdrop stand and fabric. I tied a rope from top left corner to top right corner of backdrop stand to add the bead strings that my mom got from India. For top center I used artificial flower thoran I had on hand.

Sreemantham Decoration, DIY South Indian Baby Shower Decor Ideas

For Sreemantham table its a tradition to fill 5 or 9 plates with variety of fruits, nuts, sweets and savories. I borrowed the steel plates and diya stands from my friend. My sister in law is so sweet, she took all the pain to bring my favorite sweets all the way from Atlanta to Tucson. And my mom made few at home. We added a simple 2 tier cake to the table though its not Indian custom.

Sreemantham Decoration, DIY South Indian Baby Shower Decor Ideas

Bangles and flowers are the important things on Sreemantham table. Every guest adorns mom to be with bangles and blesses mom and baby. I chose pink and green bangles to match my saree.

Sreemantham Decoration, DIY South Indian Baby Shower Decor Ideas

For return gifts I shopped these pretty bangles from India. I roughly estimated hand size of each friend and wrote names on the bangle cover to make it easy to give them in party.

Sreemantham Decoration, DIY South Indian Baby Shower Decor Ideas

We wrapped bangles and tambulam (beetle leaves, beetle nuts, fruits, pasupu, kumkum and blouse piece) together in a decorative plate. 

Sreemantham Decoration, DIY South Indian Baby Shower Decor Ideas

For the return gift bags I added a thank you note and a little bling using my Cricut.

Sreemantham Decoration, DIY South Indian Baby Shower Decor Ideas

Overall the party looked perfectly like how I wanted it to be and the best part was everyone loved home cooked food by mom and sister in law. 

Note: Websites referred are for only reader's information. I am not paid for any of the referral links.
Additional Info: If you are in USA and are looking for fresh flowers, beetle leaves, mango leaves or any pooja items there are websites that deliver them overnight to anywhere in USA. I did not know this before my sreemantham. Thought a word might help someone.

Sreemantham Decoration, DIY South Indian Baby Shower Decor Ideas

Here is a picture of me and my husband from Sreemantham (South Indian Baby Shower Party). Hope you enjoyed the party too. Thank you for stopping by.

Sunday, July 24, 2016

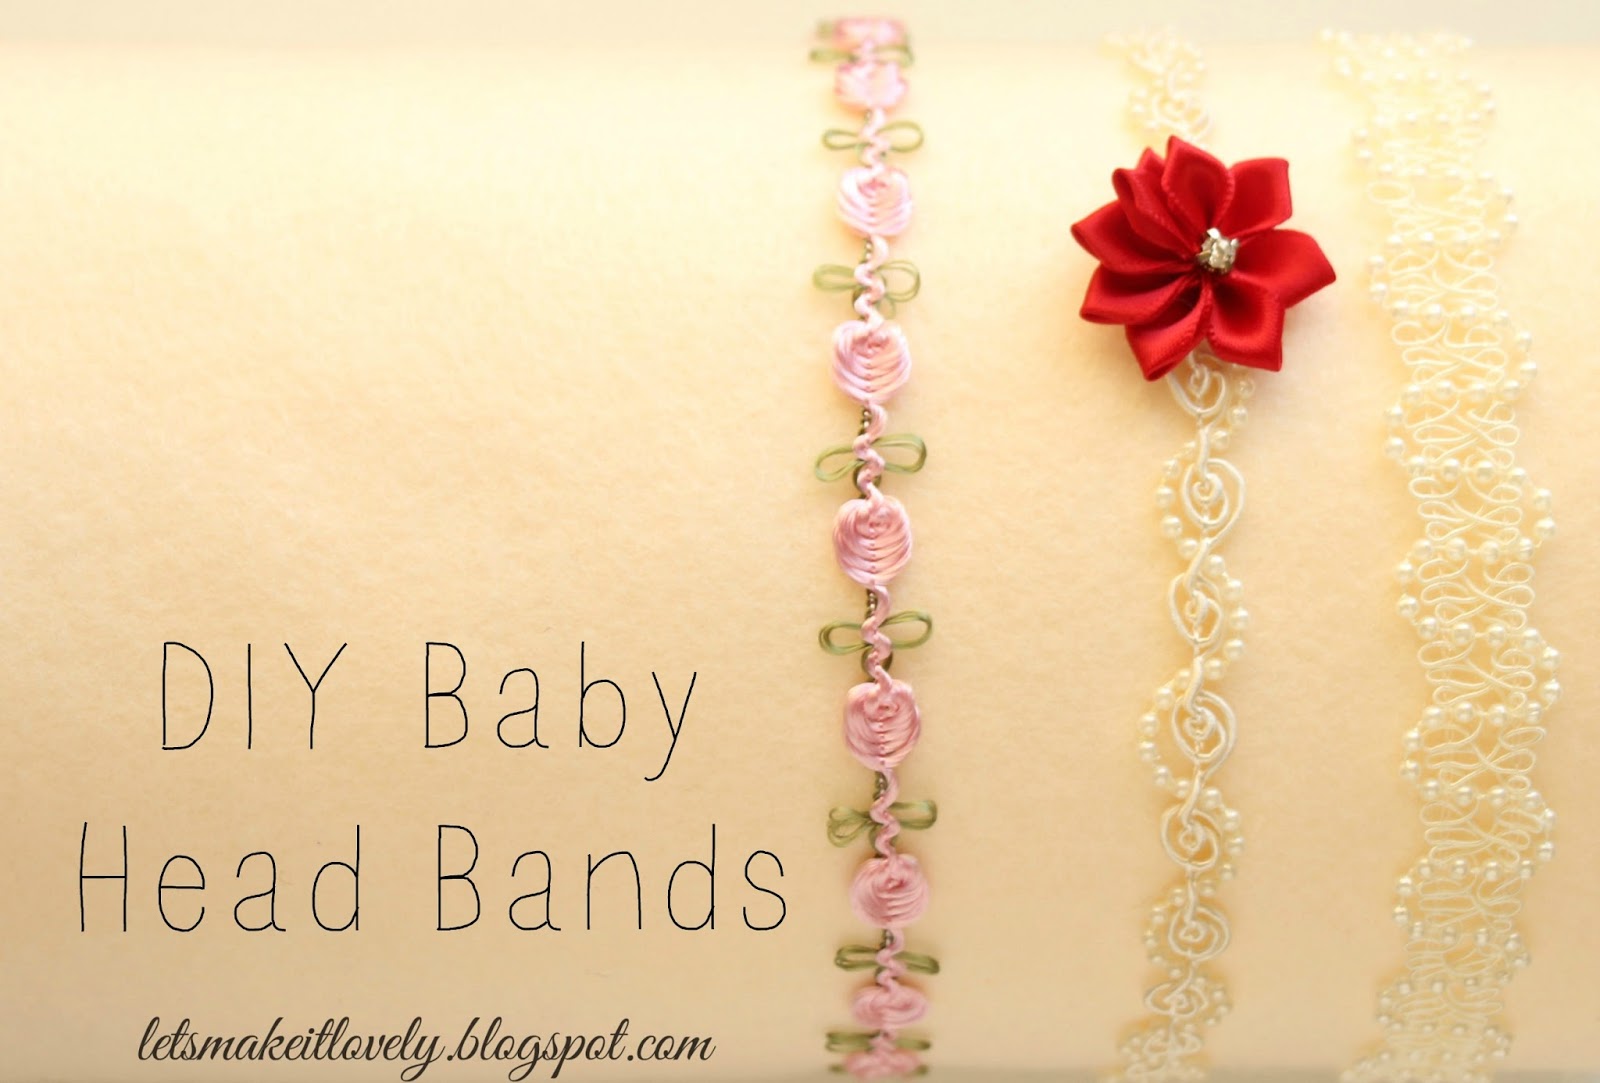
DIY Baby Head Bands


DIY Baby Head Bands. DIY Newborn Head Bands. DIY Simple Hair Accessories.Handmade gift ideas for Baby Girl. Handmade Baby Shower gift ideas.

Boutique style baby head bands are so easy to make and you can make them way under budget. These head bands are very special to me as these are the first DIY project I did for my little one. After this project I made a lot of DIY decor projects for her nursery. So stay tuned for up coming posts but forgive me, it might take a while to post them all as I am busy loving my newborn. 

DIY Baby Head Bands. DIY Newborn Head Bands. DIY Simple Hair Accessories.Handmade gift ideas for Baby Girl. Handmade Baby Shower gift ideas.

Coming back to head bands, things you need:
  • Pretty lace pieces of your choice (I got mine at local Joann craft store)
  • Matching ribbon
  • Satin ribbon flowers, big lace flowers or any other embellishments (optional)
  • Thin elastic ( I used 0.25 inch thick braided elastic)
  • Hot glue gun
  • Scissors
Don't this list look so simple? I promise the procedure is as simple as the list.


DIY Baby Head Bands. DIY Newborn Head Bands. DIY Simple Hair Accessories.Handmade gift ideas for Baby Girl. Handmade Baby Shower gift ideas.

For head band sizing information, you can google "Baby head band size chart" and you will find a ton of information. 
For example new born's head band need to be approximately 11 to 12 inches,  if you are making one for a new born cut your lace piece and elastic such that they both add up to 11 or 12 inches. 
I just made my head bands in 3 different sizes to use them as baby grows.

Cut lace and elastic pieces according to measurements you choose. Cut 2 pieces of ribbon about 1.5 inch each.

DIY Baby Head Bands. DIY Newborn Head Bands. DIY Simple Hair Accessories.Handmade gift ideas for Baby Girl. Handmade Baby Shower gift ideas.

Join one end of elastic to one end of lace using little hot glue, dab little more hot glue and wrap the joint around with a ribbon piece.

DIY Baby Head Bands. DIY Newborn Head Bands. DIY Simple Hair Accessories.Handmade gift ideas for Baby Girl. Handmade Baby Shower gift ideas.

Similarly join the other end of lace to other end of elastic and wrap the joint with ribbon using hot glue.

DIY Baby Head Bands. DIY Newborn Head Bands. DIY Simple Hair Accessories.Handmade gift ideas for Baby Girl. Handmade Baby Shower gift ideas.

Cut any excess ribbon left at the joints. If you like add a pretty flower or bow to make it even more gorgeous.

DIY Baby Head Bands. DIY Newborn Head Bands. DIY Simple Hair Accessories.Handmade gift ideas for Baby Girl. Handmade Baby Shower gift ideas.

That's it you just made a pretty head band. Isn't it the easiest craft you ever made?

DIY Baby Head Bands. DIY Newborn Head Bands. DIY Simple Hair Accessories.Handmade gift ideas for Baby Girl. Handmade Baby Shower gift ideas.

Here are a couple more headbands I made for my little angel. Try using thicker lace or elastic bands with beautiful vintage style lace flowers for a glamorous look. 

DIY Baby Head Bands. DIY Newborn Head Bands. DIY Simple Hair Accessories.Handmade gift ideas for Baby Girl. Handmade Baby Shower gift ideas.

These handmade headbands take very little time to make for your baby girl and they can add a touch of love to your baby shower gifts. I hope you enjoy making these as well. I love to hear your comments. Thank you for stopping by. Have a great day :)