As I mentioned in my previous post, I started putting together my patio. I got my andorak chairs from Lowes last summer and I really like their green color. However, I wanted to add a stroke of brightness and what's a better way to add color to chairs than comfy cushions. Since I decided to challenge myself with a 100$ budget for my entire patio makeover, I wanted to upcycle stuff that I already had on hand as much as I can. So here is a before and after picture of my pillows.
The brown decorative pillows are from our old comforter set. The comforter had to leave our home after a lot of wear and tear and I saved the decorative pillows as they were in pretty good shape. The cushion with orange and green shades is my favorite pillow that sits on my sofa with me, though its odd one out in our living room decor I really love it because that pillow cover is the first sewing project on my sewing machine. I decided to upgrade these 3 pillows for my patio chairs.
Things used:
First, I prewashed my white home decor fabric on which I planned to stencil.
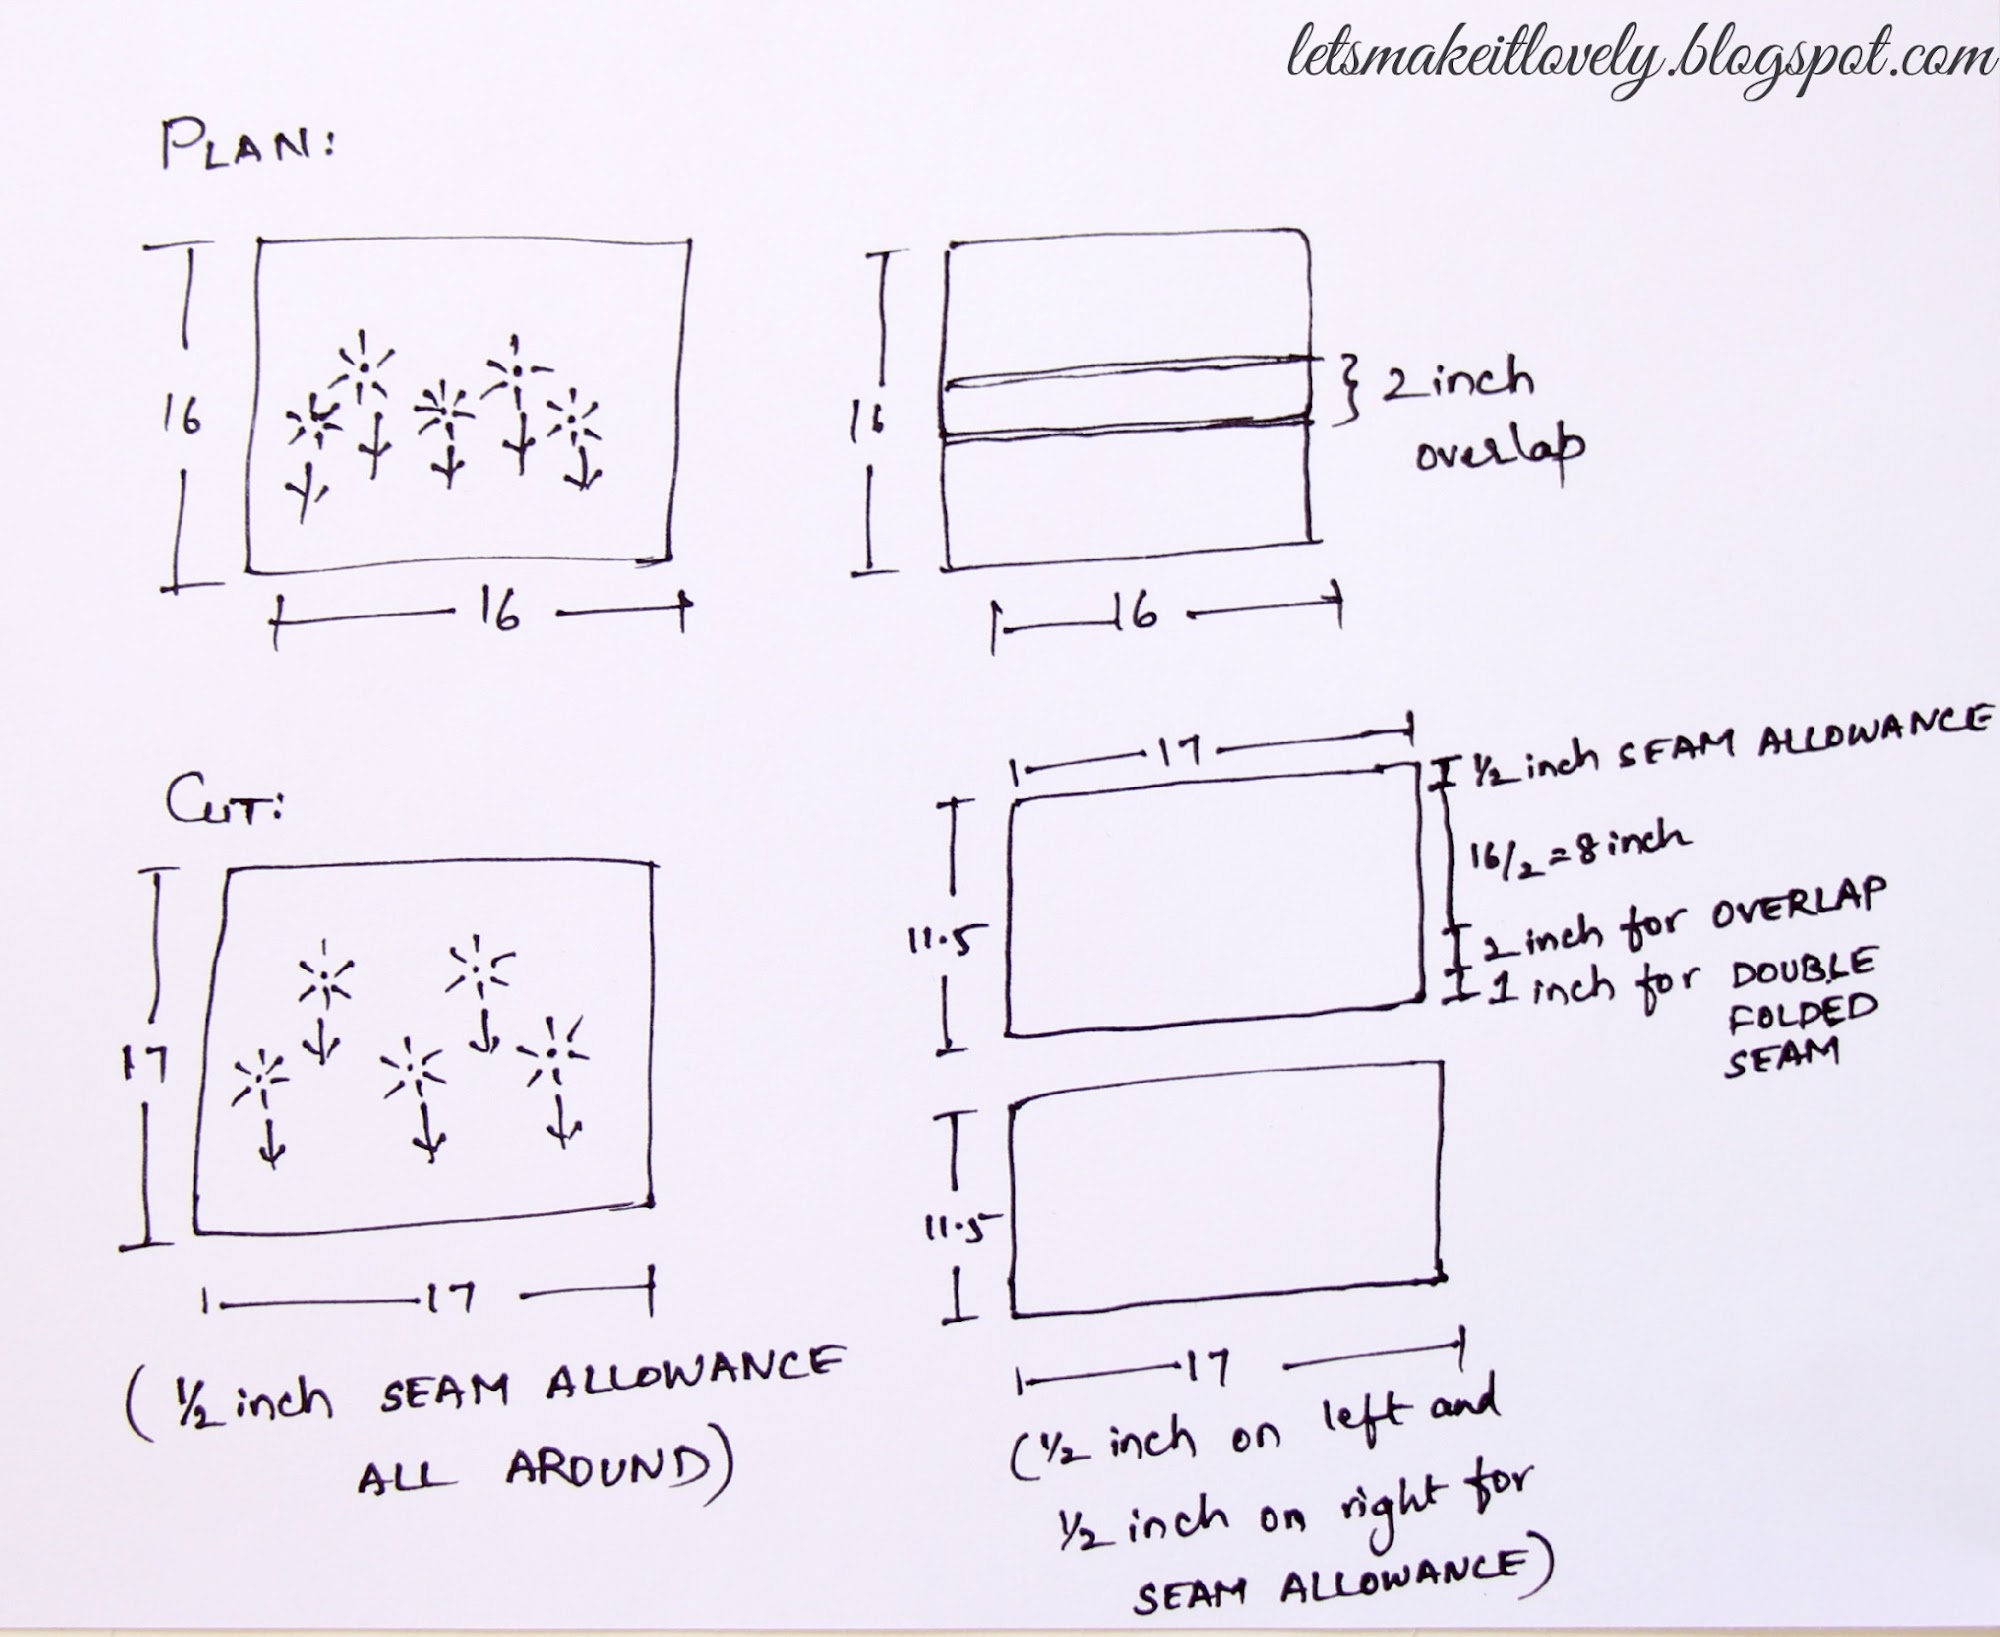
My 2 big pillows measure 16 x 16, so I cut 2 of 17 x 17 white home decor fabric pieces to stencil on. These 2 pieces are going to be front side of my 16 x 16 pillows with half inch seam allowance on all the four sides.
As I was using craft acrylic paints that are not made for fabric I mixed it with textile medium to turn it into fabric paint. Yes! you can do that. I tested this method on a scrap fabric before starting this project and I just loved the results. Just follow the instructions on your textile medium bottle. Mine requires a heat set after 24 hours dry time and then the fabric is good to go, even into the washer. God!!! this unleashed tons of cute little fabric painting project ideas for me.
I planned a floral wreath design for one of the pillows. Placing my dinner plates upside down on the fabric I traced 2 concentric circles with temporary fabric marker. Then I started stenciling the flowers all around the circle and I hand painted few branches and leaves to connect the flowers. I felt I had more control over the paint when I used paint brushes instead of stencil pouncers on fabric. If you want to know more on how to stencil in detail, refer to my pot stenciling post where I mentioned dos and don'ts on stenciling.
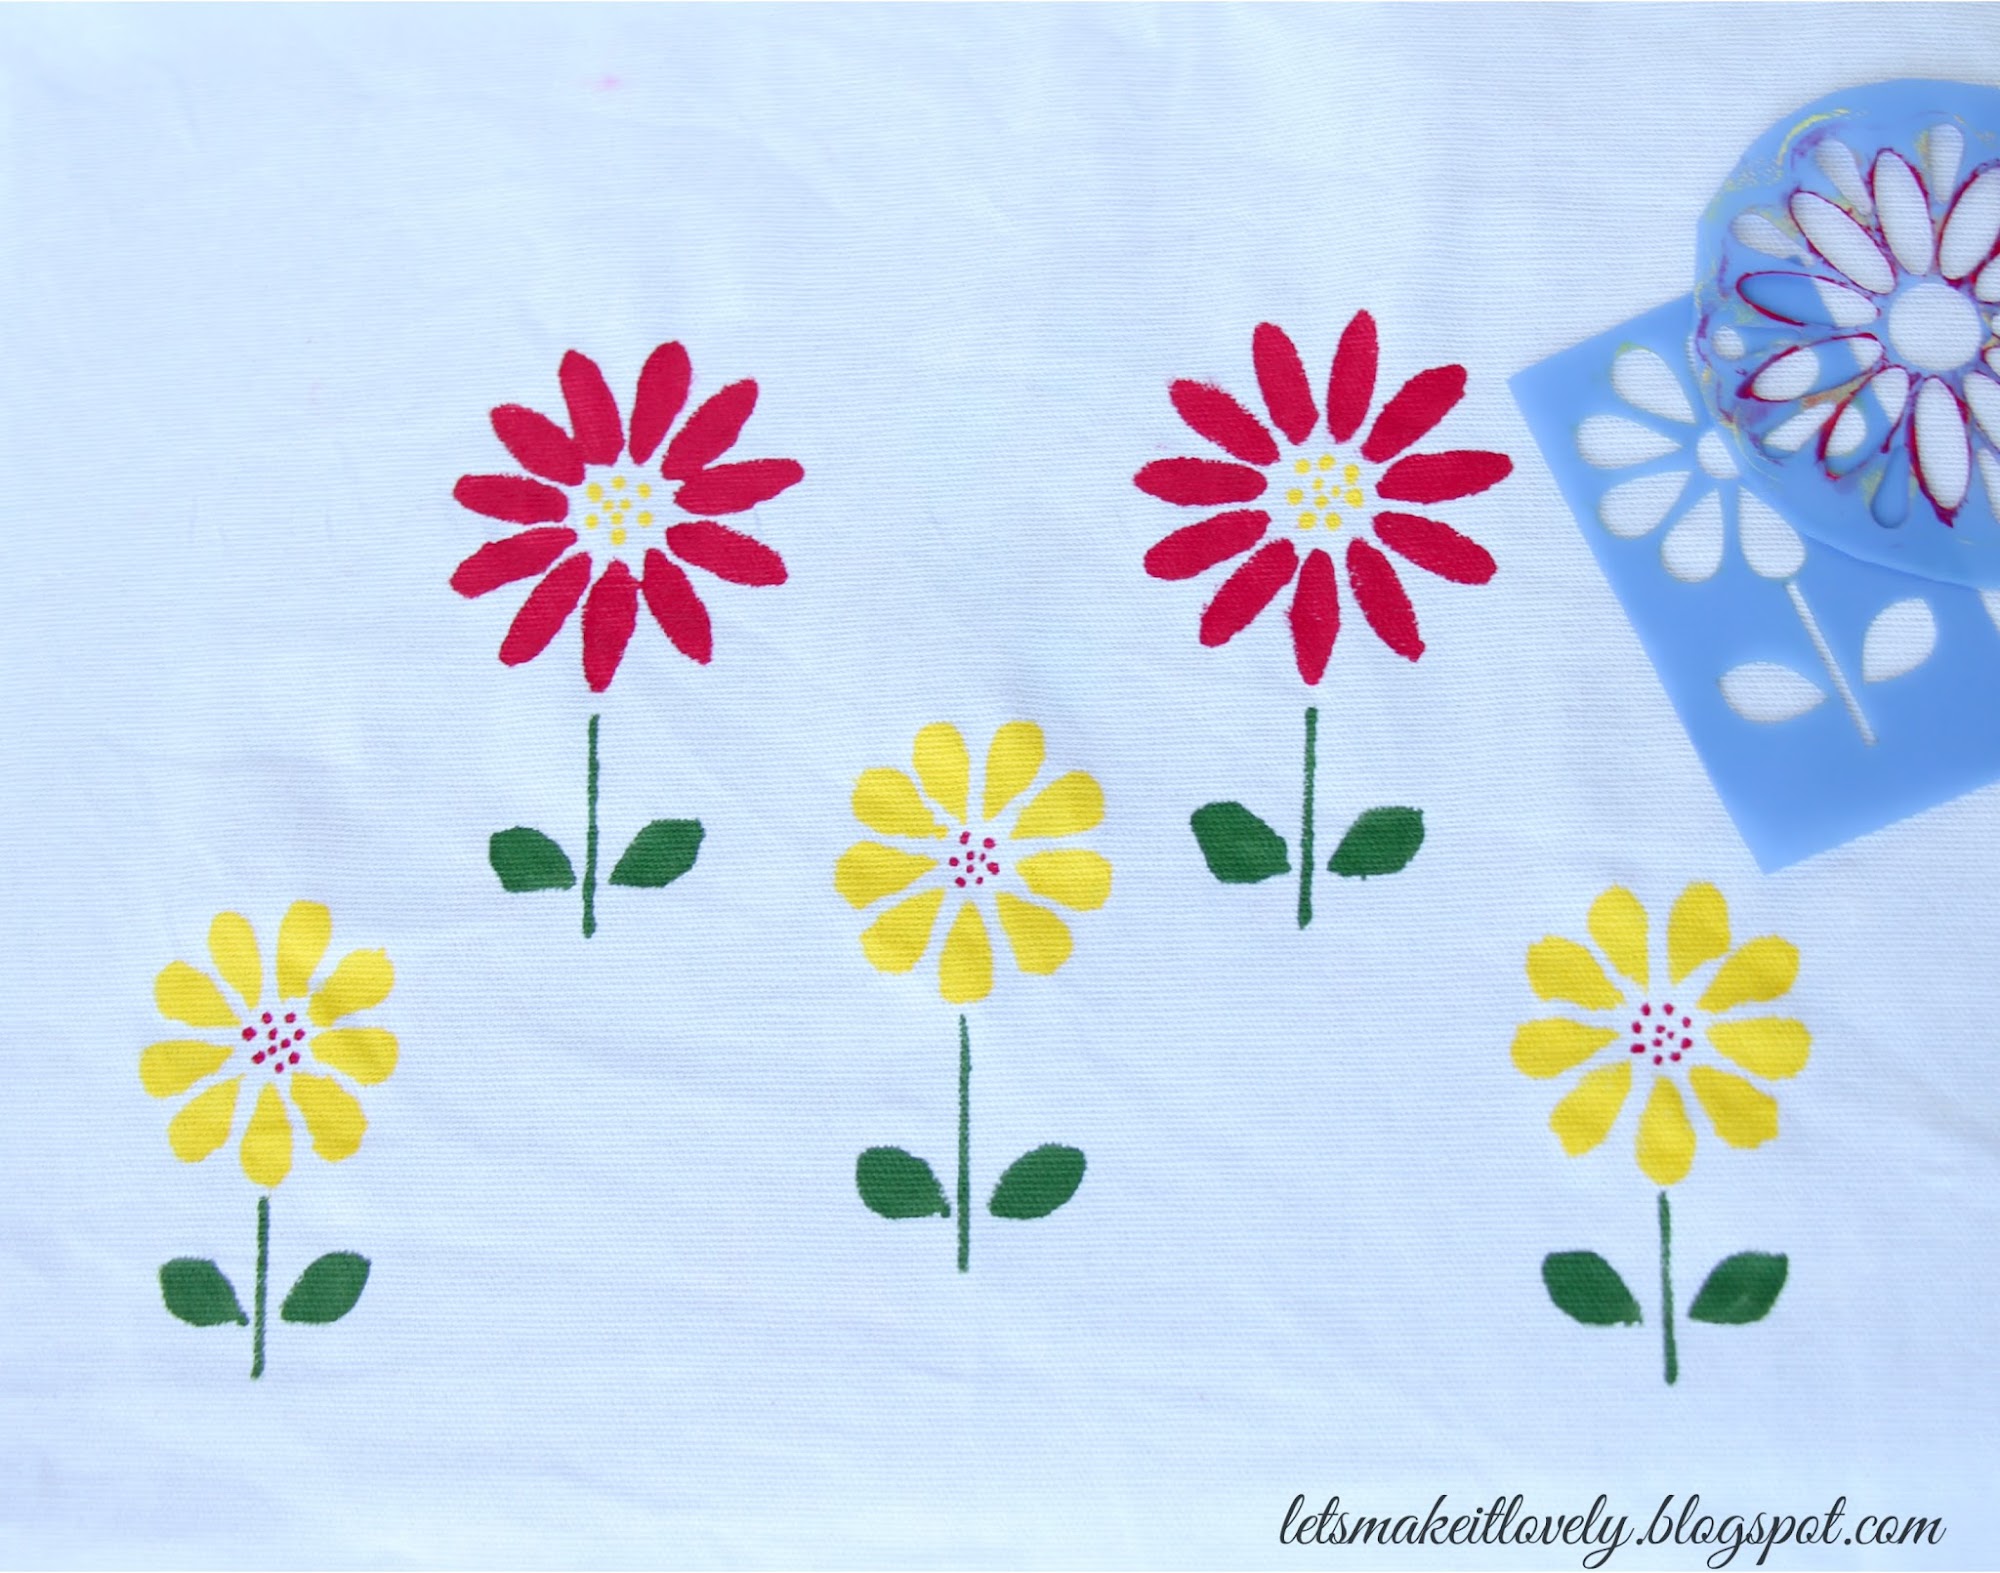
I am no expert in stenciling, I did end up with flared petals and weird shaped flowers which I craft-fully turned into something pretty (or atleast I think so). In the above picture one of the pink flower petals is clearly flared too much and which is why I gave the entire flower a red color edge to make it look less obvious. The red flower is a disaster. I was trying to stencil very small flower with pouncer and ended up covering it with circular petals using my paint brush.
Here is one more example of adding green stem right where the yellow paint seeped through the stencil. After these mistakes I shifted to paint brushes from pouncers and they worked great. Hey! Lesson learnt.
Use narrow tip brushes to paint small flowers, leaves and thin stems. (Try to design something creative if you do end up with little paint mistakes.)
This is how my 2 stenciled fabric pieces looked like once I am done. I was initially planning to add text in the middle of wreath design like "Smile" or "Relax". But I really liked how they turned out and wasn't daring enough to paint something on it and loose what I already think looks pretty enough.
You need 2 Pieces for the back with 2 inches overlap.
Things used:
- 1/2 yard white home decor fabric (for white pillow fronts)
- 1/2 yard of white denim from my fabric stash (for pillow backs. Ofcouse you could go ahead and use outdoor fabric or home decor fabric for backside too but I just wanted to use the fabric I already had.)
- Yellow Polka dot fabric quarter
- Pink fabric piece for rosettes
- Hot glue gun
- Stencils
- Acrylic craft paints
- Textile medium (If you are using fabric acrylic paints you don't need textile medium)
- Paint brushes (You can use Stencil brushes. I just went ahead with paint brushes as I had them on hand)
- Temporary fabric marker (optional)
First, I prewashed my white home decor fabric on which I planned to stencil.
My 2 big pillows measure 16 x 16, so I cut 2 of 17 x 17 white home decor fabric pieces to stencil on. These 2 pieces are going to be front side of my 16 x 16 pillows with half inch seam allowance on all the four sides.
As I was using craft acrylic paints that are not made for fabric I mixed it with textile medium to turn it into fabric paint. Yes! you can do that. I tested this method on a scrap fabric before starting this project and I just loved the results. Just follow the instructions on your textile medium bottle. Mine requires a heat set after 24 hours dry time and then the fabric is good to go, even into the washer. God!!! this unleashed tons of cute little fabric painting project ideas for me.
I planned a floral wreath design for one of the pillows. Placing my dinner plates upside down on the fabric I traced 2 concentric circles with temporary fabric marker. Then I started stenciling the flowers all around the circle and I hand painted few branches and leaves to connect the flowers. I felt I had more control over the paint when I used paint brushes instead of stencil pouncers on fabric. If you want to know more on how to stencil in detail, refer to my pot stenciling post where I mentioned dos and don'ts on stenciling.
I am no expert in stenciling, I did end up with flared petals and weird shaped flowers which I craft-fully turned into something pretty (or atleast I think so). In the above picture one of the pink flower petals is clearly flared too much and which is why I gave the entire flower a red color edge to make it look less obvious. The red flower is a disaster. I was trying to stencil very small flower with pouncer and ended up covering it with circular petals using my paint brush.
Here is one more example of adding green stem right where the yellow paint seeped through the stencil. After these mistakes I shifted to paint brushes from pouncers and they worked great. Hey! Lesson learnt.
Use narrow tip brushes to paint small flowers, leaves and thin stems. (Try to design something creative if you do end up with little paint mistakes.)
This is how my 2 stenciled fabric pieces looked like once I am done. I was initially planning to add text in the middle of wreath design like "Smile" or "Relax". But I really liked how they turned out and wasn't daring enough to paint something on it and loose what I already think looks pretty enough.
Pillow cover Sewing Tutorial
Sewing an envelope pillow cover is the easiest sewing project ever for beginners. No buttons, no zippers, no piping are required. You just learnt to sew a straight line?? Congrats! you can stitch this pillow cover under 10 mins. Here is a step by step tutorial for you.
Measure and Cut your fabric pieces:
In above picture, I am showing how I measured and cut fabric for my 16 x 16 pillow.
Here is what you need to do to sew one that fits your pillow:
For front:
- Measure your pillow width and height.
- Add half inch seam allowance to all four sides of pillow measurements, to get the front piece.
You need 2 Pieces for the back with 2 inches overlap.
- You are going to keep the width same as front cut piece, that is width of the pillow + half inch seam allowance to left + half inch seam allowance to right.
- Height of these 2 pieces is going to be half inch seam allowance at the top + half of the height of the pillow + 2 inches overlap + 1 inch for double folded hem.
Hope you got it!! Let me know if you have any questions in the comments. Once you got correct measurements and cut your fabric you are 70% done.
Take one of the back fabric pieces and fold half inch along the horizontal edge that falls in the middle. Iron it. Repeat half inch fold and again iron on it. These makes it easy to sew our double folded hem.
Finish sewing the double folded hems on both back fabric pieces.
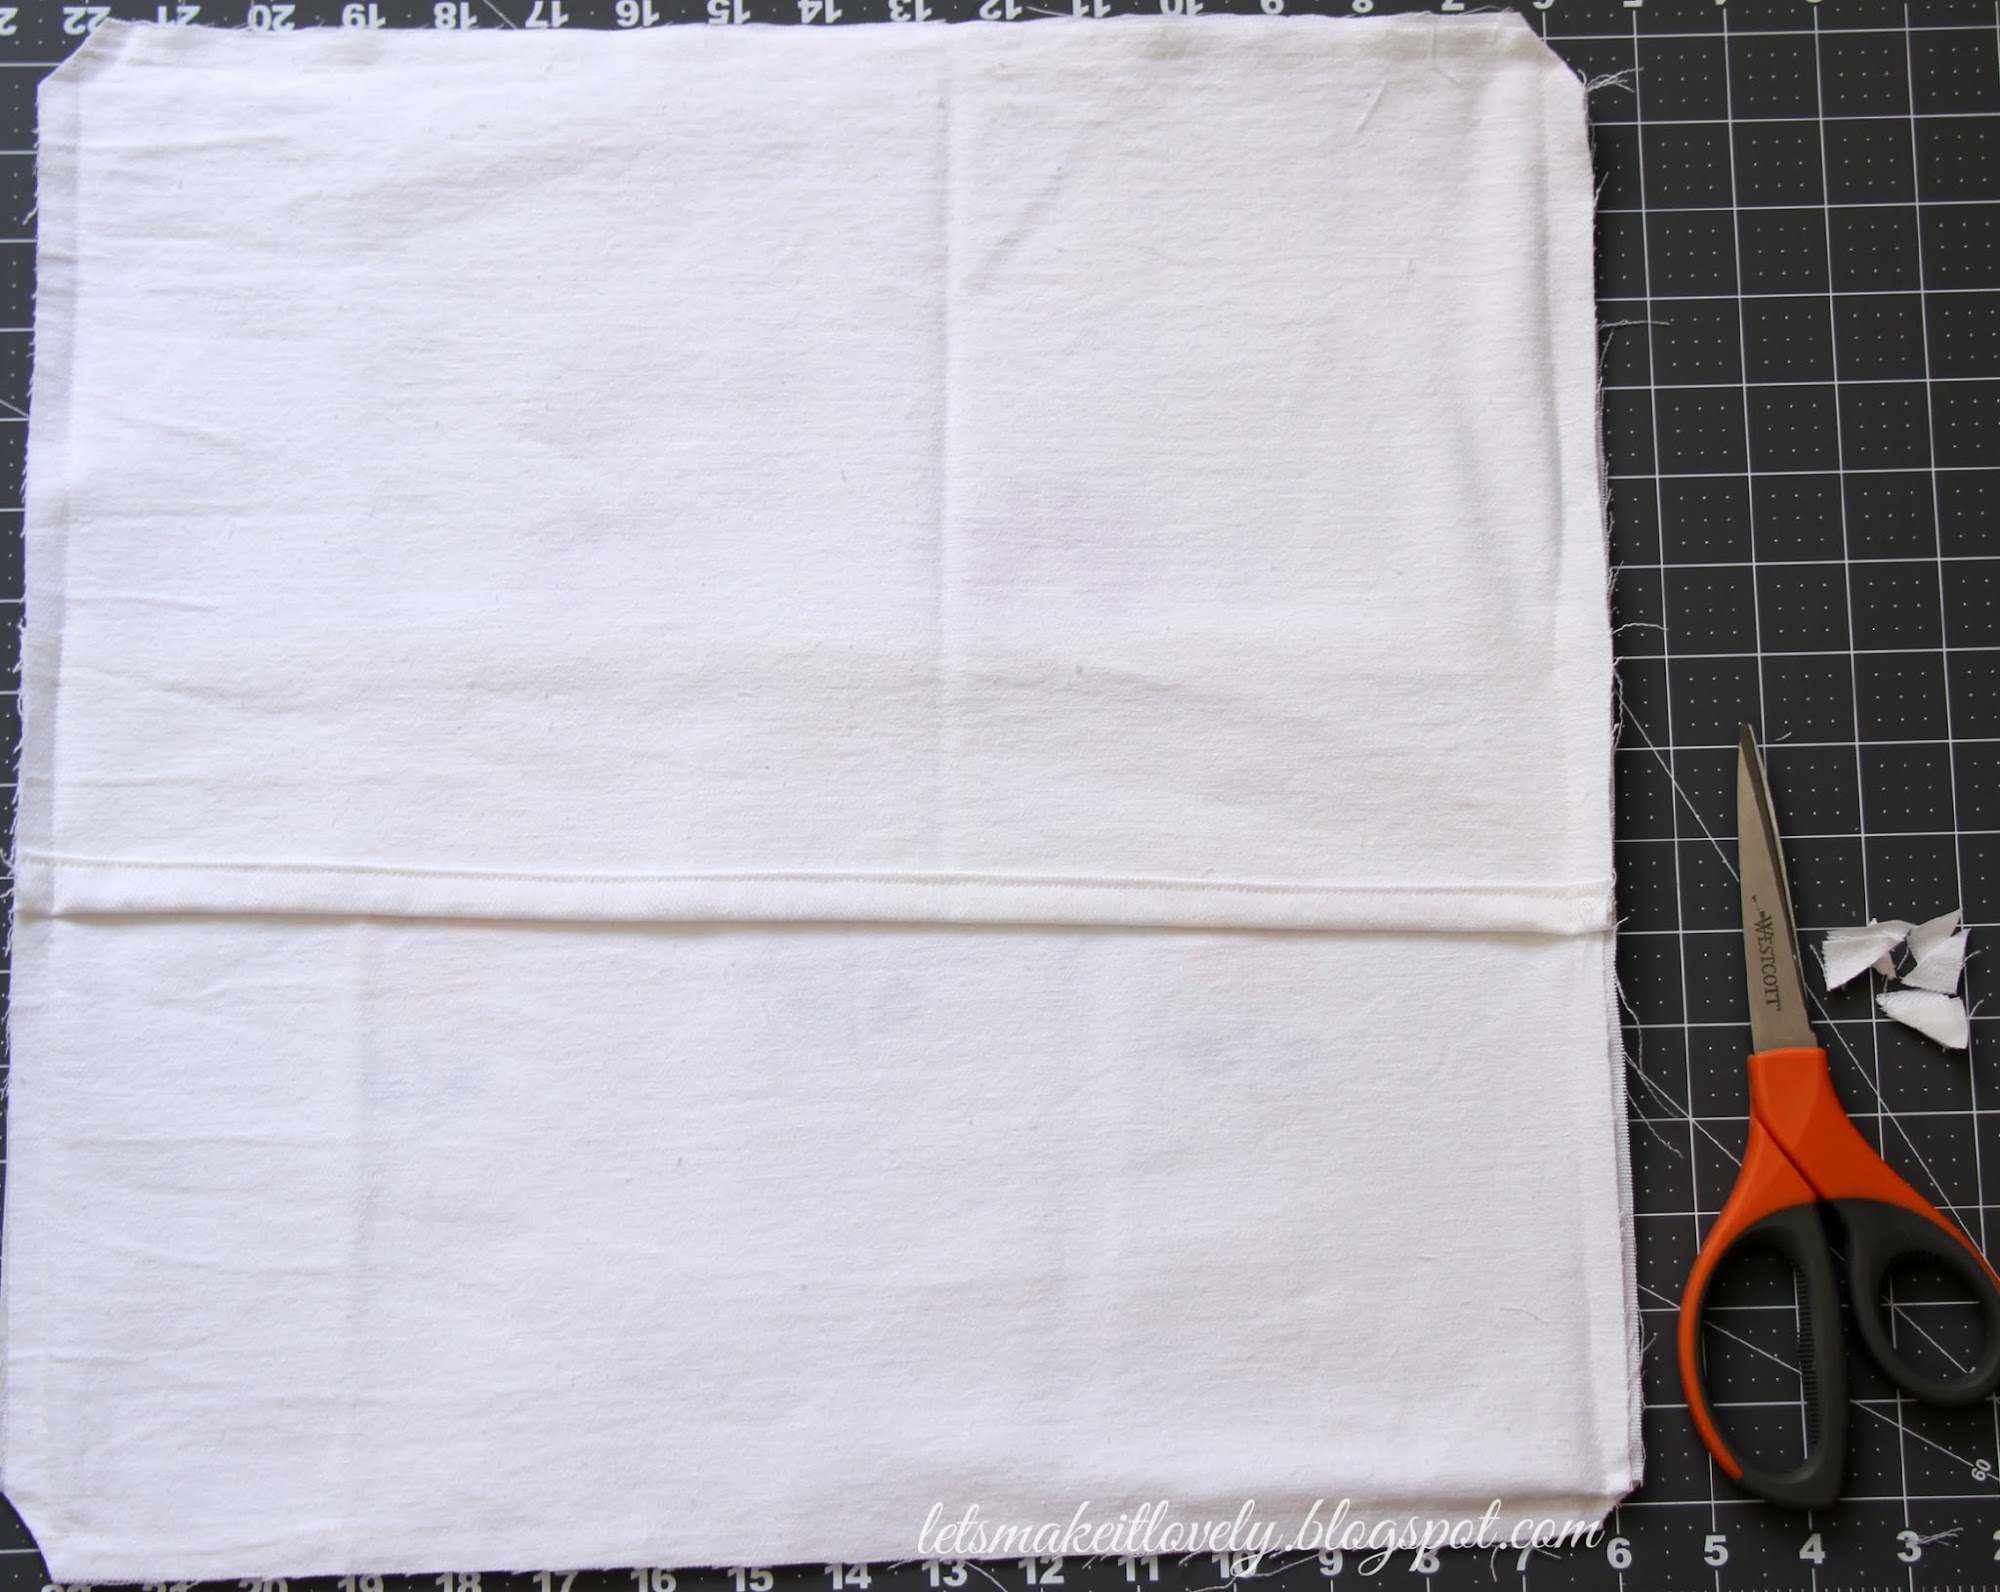
Lay the front piece with right side facing up, then one back piece with right side facing down and finally another back piece on top with right side facing down. Make sure to line up the outer edges with front piece edges.
Pin all four sides, while holding all the 3 pieces together.
Sew all the four sides and trim the corners so that it doesn't bulk up the pillow cover corners when we turn it right side out.
Turn the pillow cover right side out and insert the pillow form. Tada! I told you, it's easy. Didn't I ?
I made this fabric rosettes with pink fabric scrap I had, to embellish my yellow pillow. All you need is fabric pieces and hot glue gun to make these rosettes. There are so many tutorials out there in many craft blogs and youtube on how to make them.
Finally, a picture of all 3 pillow covers I made. I love the fact that I spent only 4$ (for fabric) on this project as I had most of the stuff already on hand.
Let me know what you think about these pillows. I love to hear your comments. Thank you for stopping by. Have a great weekend! :)


