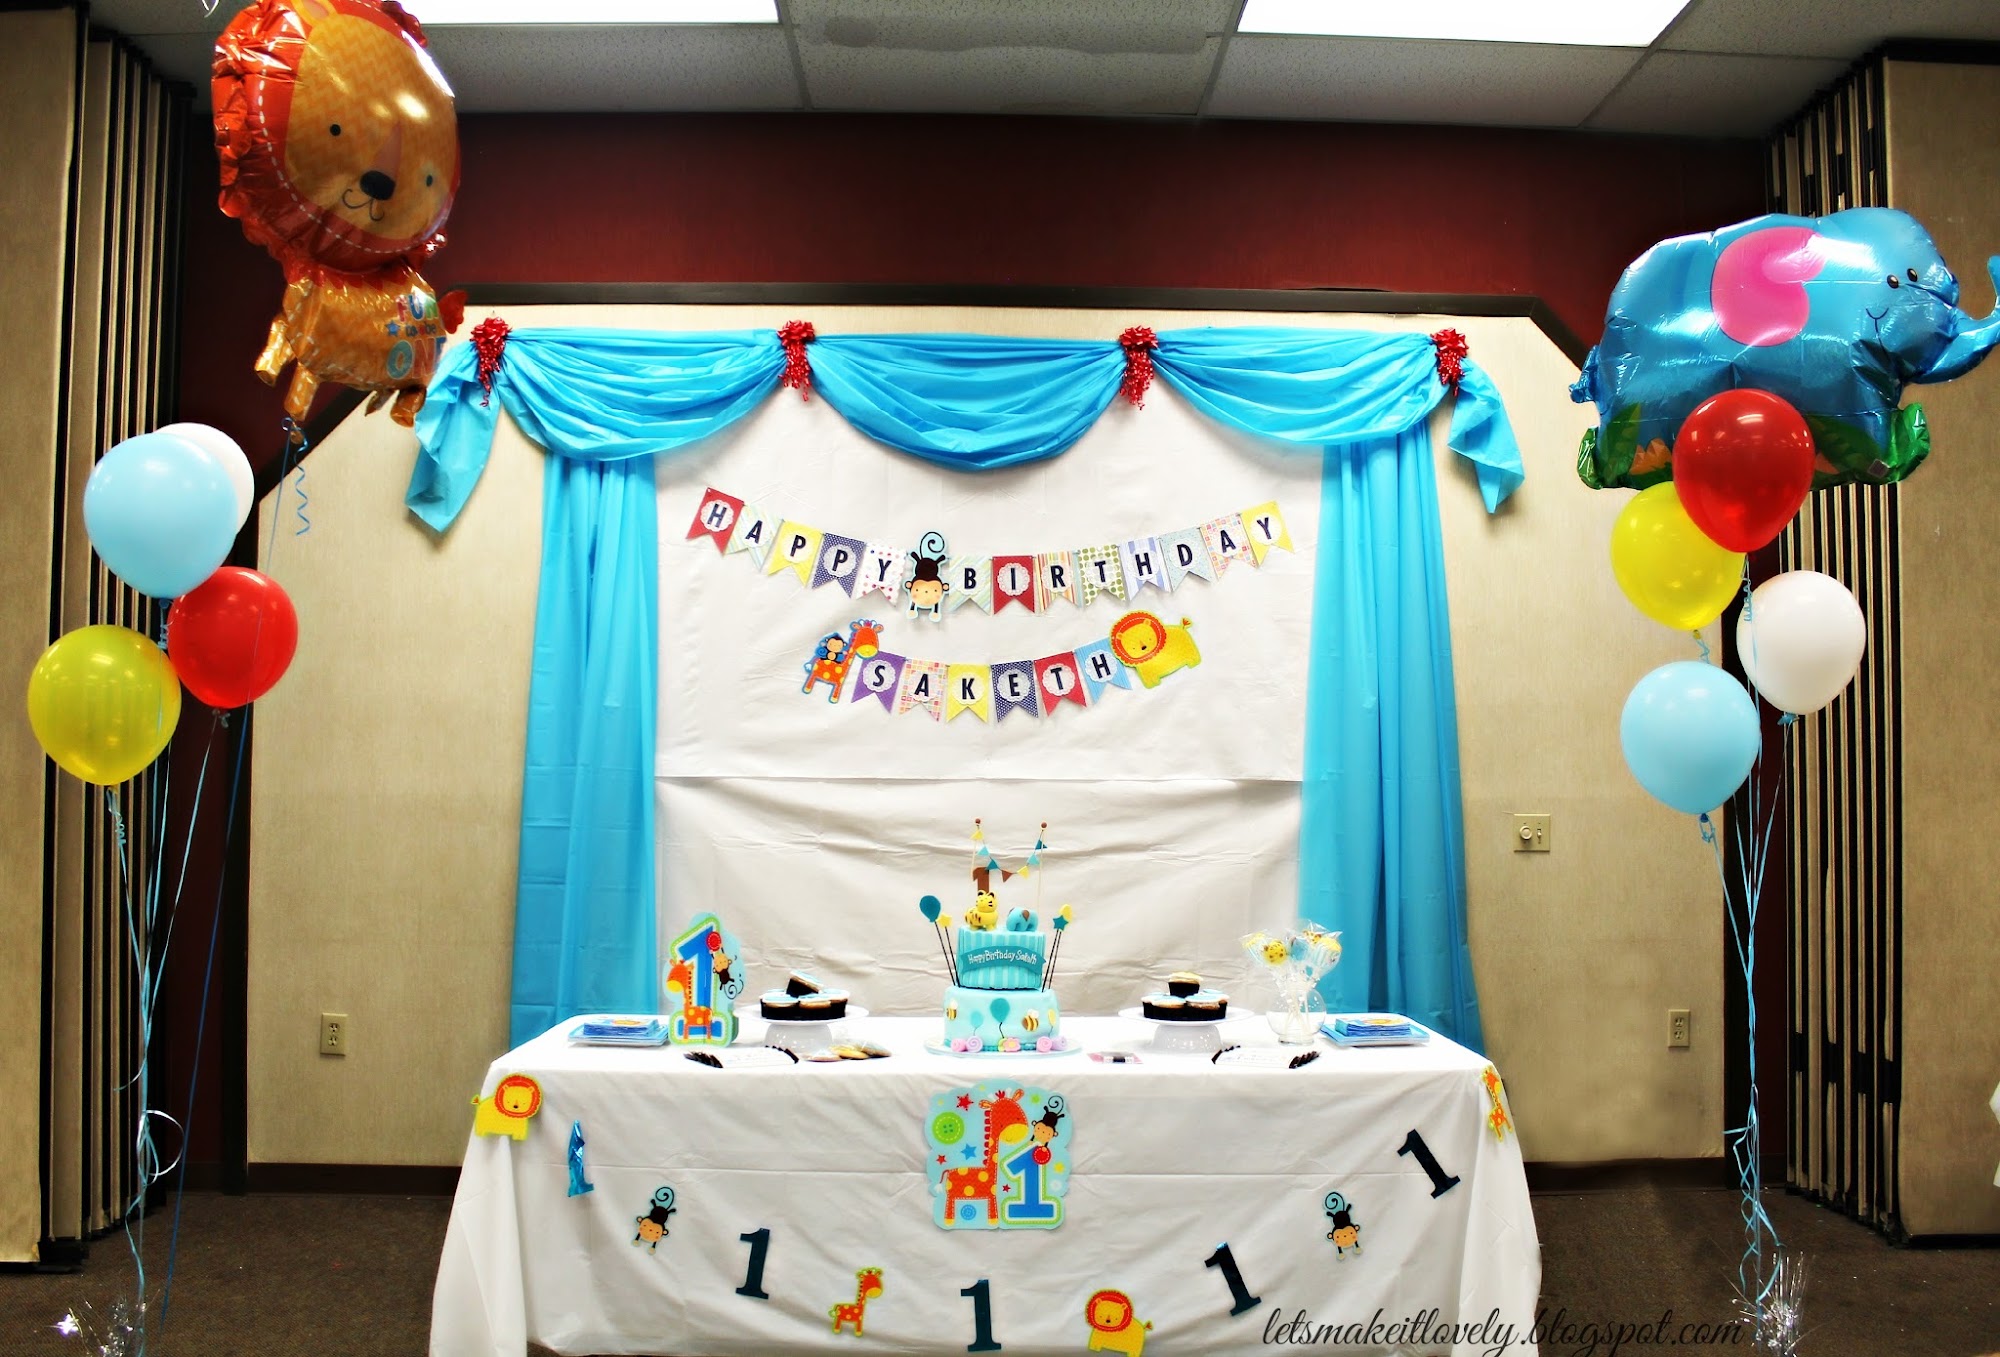
Hi friends, this post is all about sharing with you how we (myself, birthday boy's parents and aunt) managed to DIY entire birthday party decor including all the knick knacks.
To see how I made this Colorful Bunting Birthday Banner check out my previous post here.
Coming to the backdrop, we got 2 white vinyl table covers and 4 blue plastic table covers from party city. We gathered 2 of the blue plastic covers in drapery style for the top border. We just stapled the plastic cloth after gathering it together and taped it around to be sure. Above picture shows how we did it before hand at home to save some time at venue.
For rest of the backdrop we just ironed white vinyl table covers we got to make wrinkles less obvious (always use a cloth on top of vinyl cover before you iron) and for the sides we just dropped blue plastic covers on either ends. Using table covers instead of fabric for backdrop makes it possible to achieve the looks way under budget.
Those cute little monkeys, lions and giraffes you see here and there are from fun to be one boy set from party city. However you could always print them at home or a print store.
Isn't that chocolate wrapper cute??? It screams cuteness to me and they are personalized with birthday boy's name :) We designed this chocolate wrapper from scratch using picmonkey.com . I am not paid to say this but I just love picmonkey for making it so easy to design amazing printables.
After designing we printed them at a office print press on to magazine style glossy paper. Once printed we cut them to size and stuck them using double side tape at the back where two ends overlap a little. By the way they are regular Hershey's chocolates behind the wrapper.
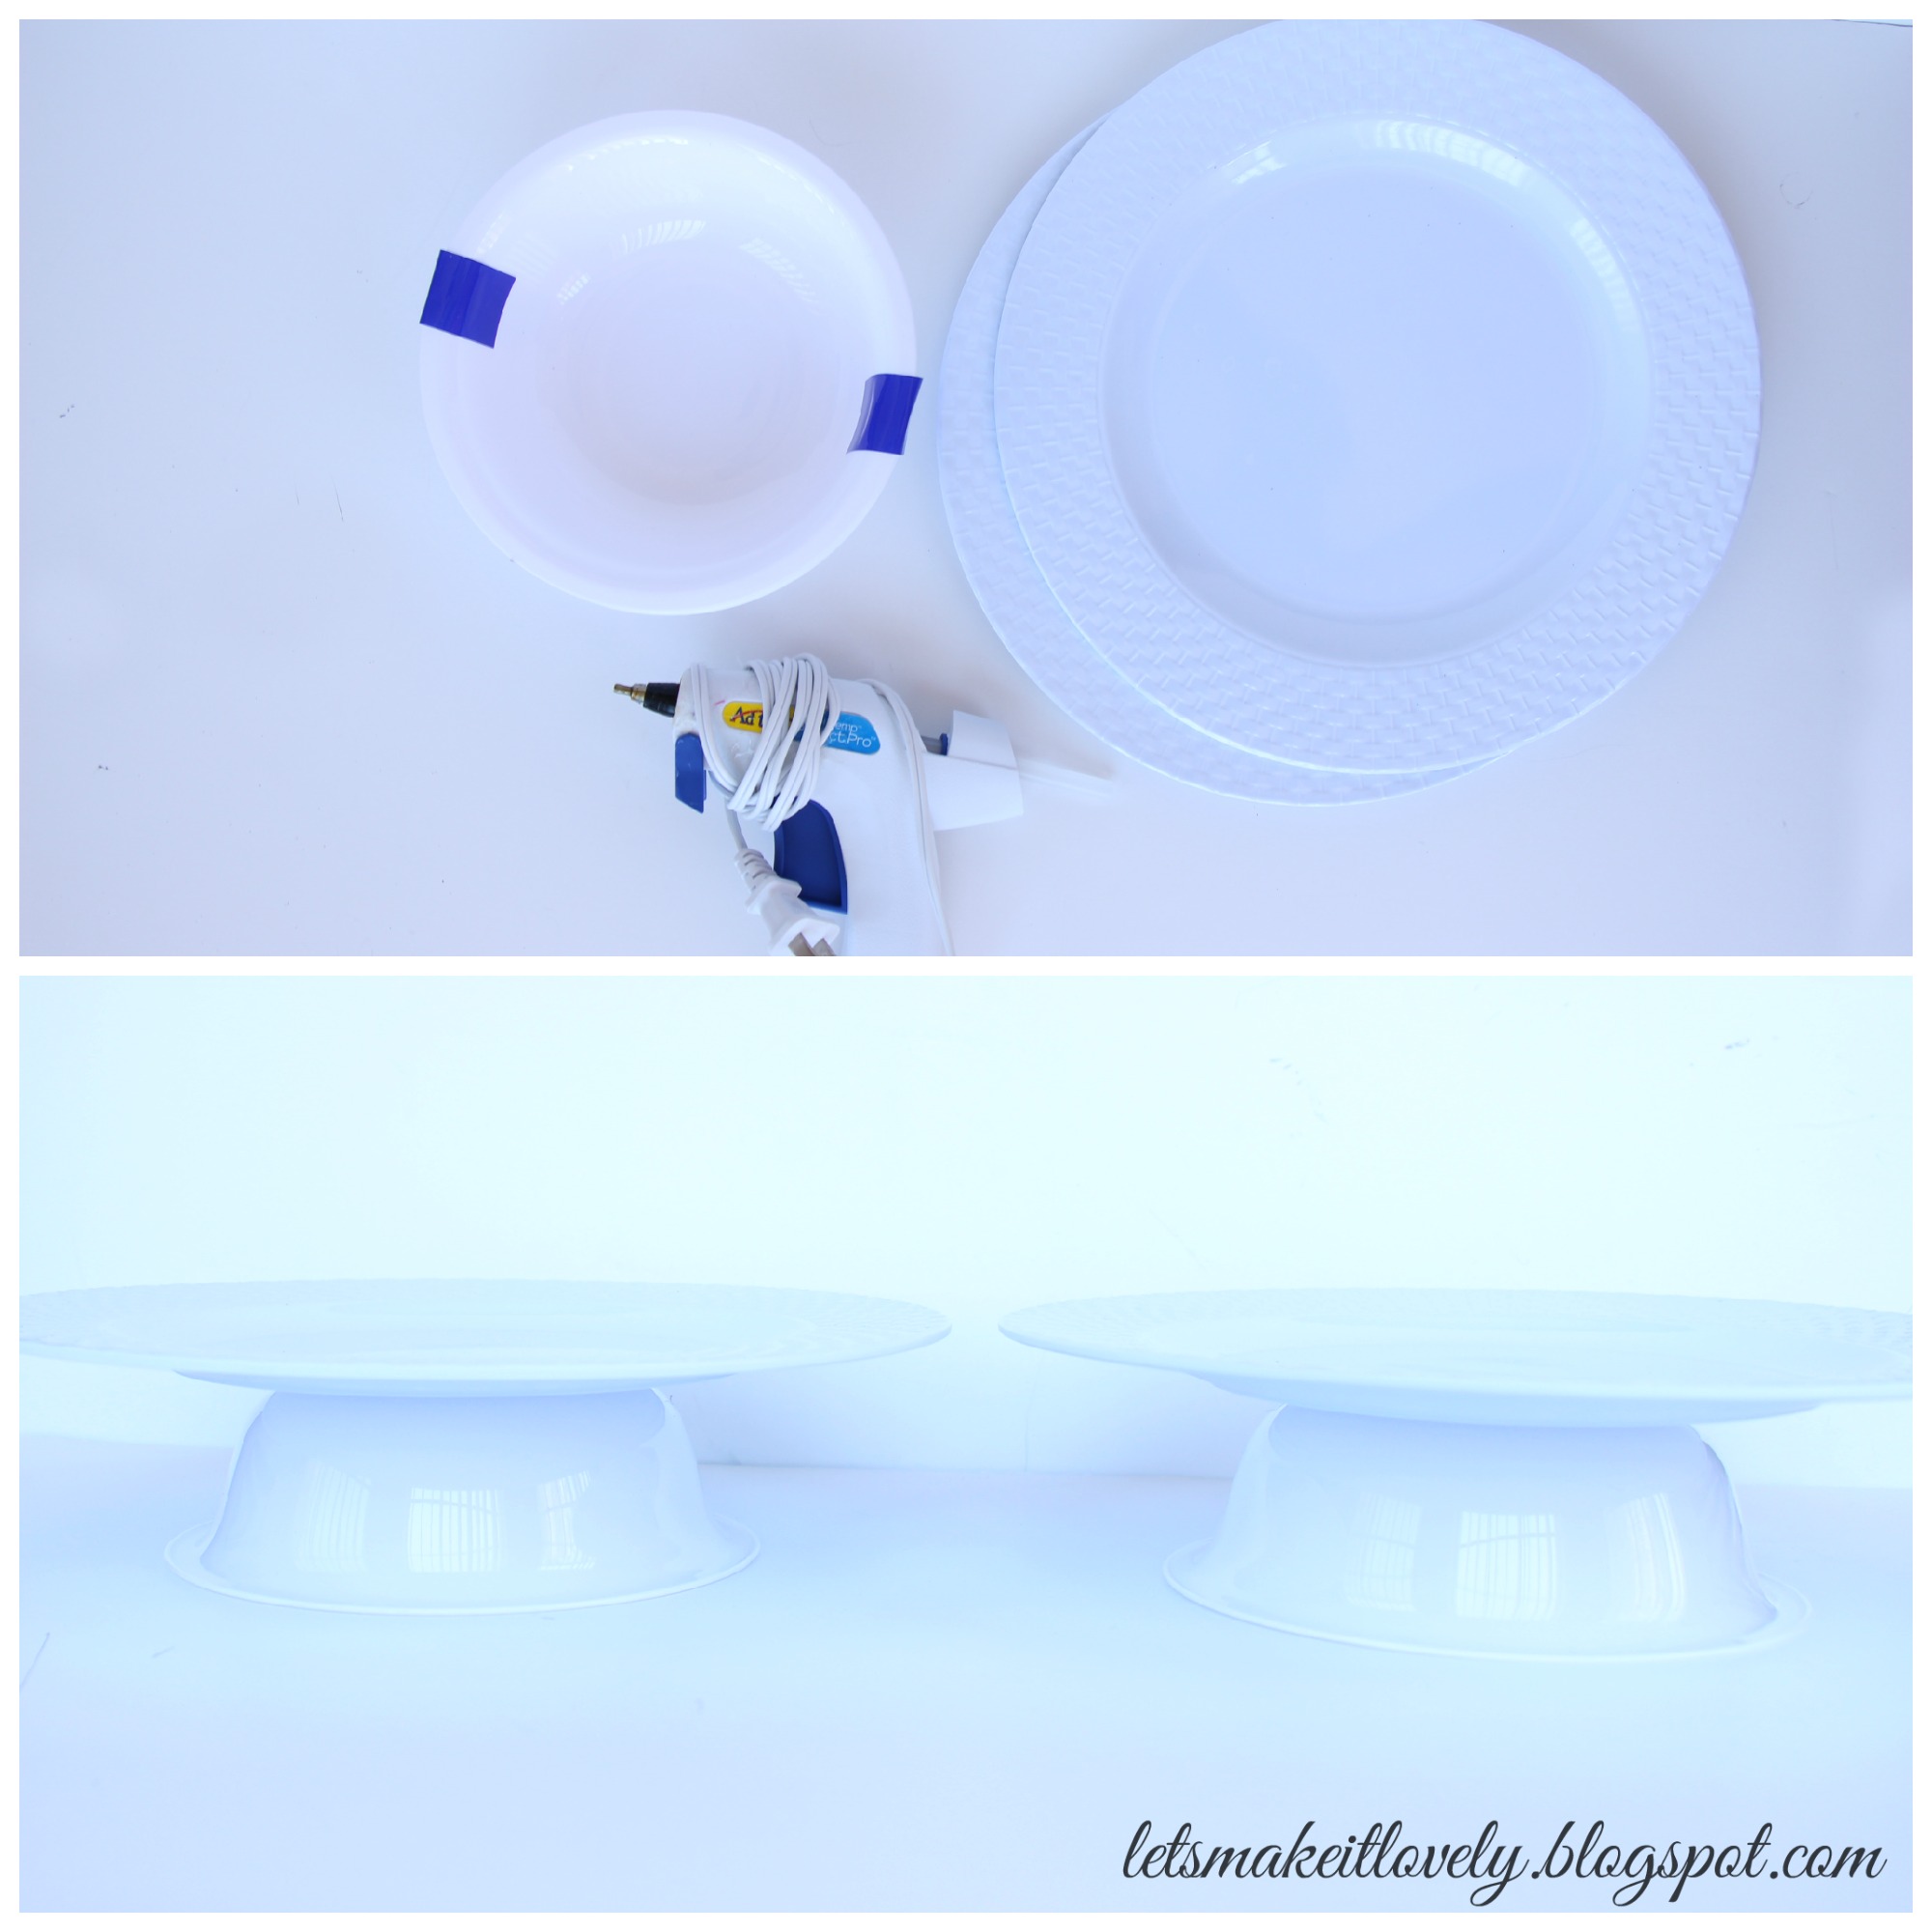
Here is one more simple DIY Cupcake Stand using dollar store plastic bowls and plates. We got 3 of those bowls for a dollar and the plates for dollar each at a local dollar tree. With just a little hot glue gun magic we joined bottom of the bowl to center bottom of plate and Tada! cupcake stand is all ready.
Here are the pictures of cupcake stands in action. We arranged them on either side of the birthday cake.
Yes! We made those Thank you tags too, without any fancy cutting machines. We designed the tag using picmonkey.com, printed onto thick glossy sheet at a office print press and then we hand cut each of the tags using a pair of scissors. It was little tedious to cut those fancy edges but the end result was well worth it.
We put together little bags of sweet treats and topped with a Thank you tag for everyone who attended the party.
Basket of sweet treats and little fun goodies for kids at the party.
Last but not least we also made a photo booth out of plastic table covers from dollar tree. I made a banner saying "Photo Booth" the similar way that I made Bunting Birthday Banner. Photo booth is always a fun option for both kids and adults.
My friend (Birthday boy's mom, Shriranjini) ordered few of the props on etsy.com and we got those colorful garlands from dollar tree. We made "Grab a prop and strike a pose" poster using picmonkey.com, printed and put it into a dollar tree acrylic photo frame.
Here is a close up picture of cute and delicious cake, just for you. I hope you enjoy this post as much as we enjoyed the party.
Thank you for stopping by. I love hearing your comments. Have a great day :)


Way to go roopini!!!
ReplyDeleteThank you :)
DeleteNice lovely decorations for birthdays :)
ReplyDeleteYou rock the event event!
Sit all you want
Thank you so much :)
Delete